Team members and roles
Invite people, choose what each person can do and which workspaces they see, and require two-step login for the whole team.
On this page
Who this is for: owners and admins on the Growth plan or higher, where you can add team members (Growth includes 3 seats, Agency 10). Free and Starter include one seat.
Go to Account > Team.
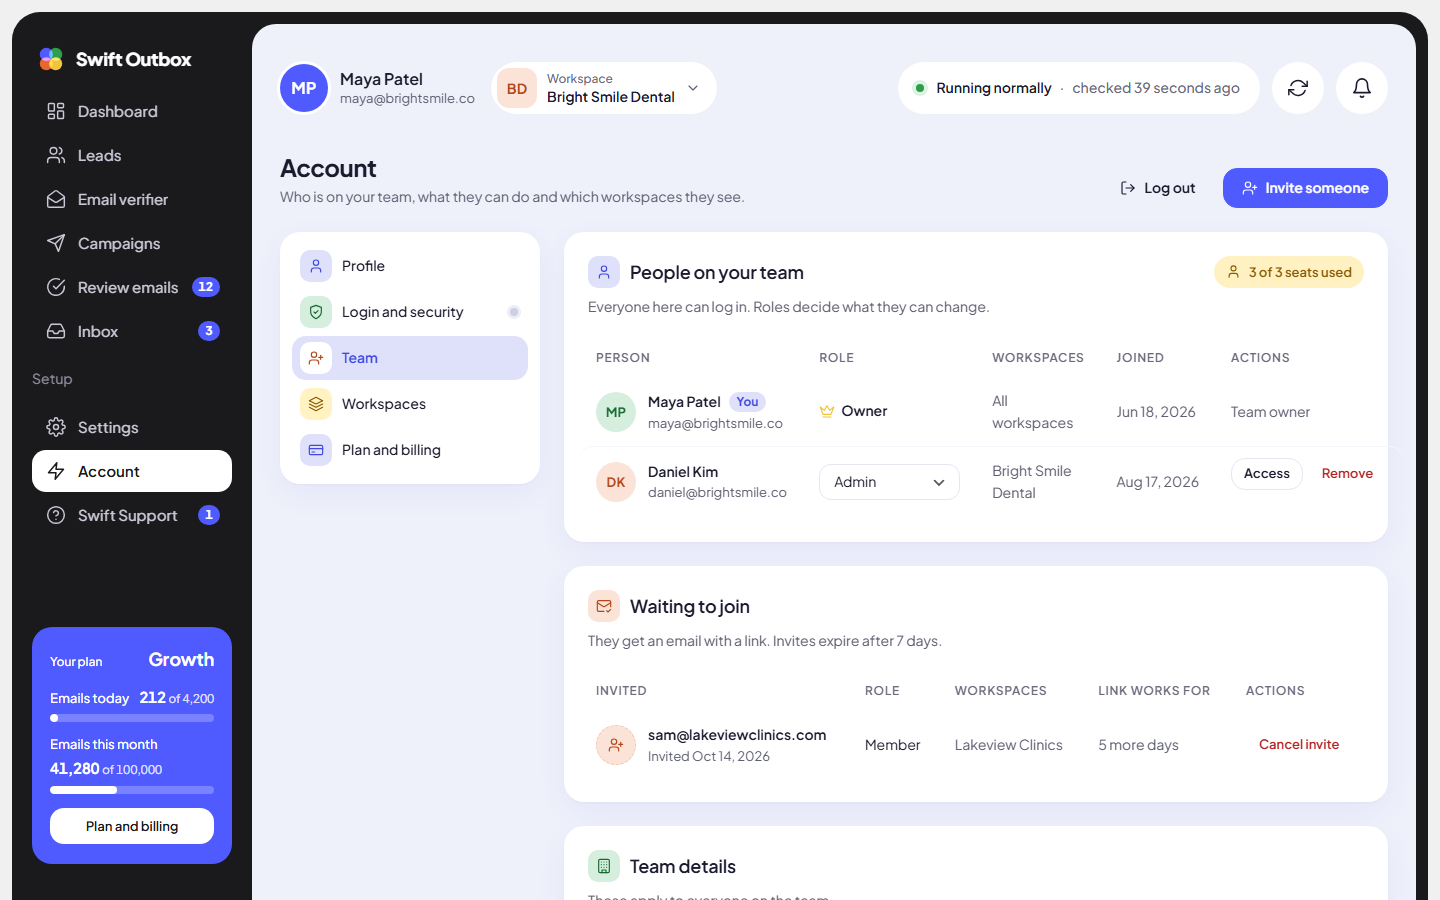
The four roles
| Role | What they can do |
|---|---|
| Owner | Everything, including closing the team, deleting workspaces and handing over ownership. There is one owner. |
| Admin | Change settings, invite people, change roles and access, and manage the plan and billing. |
| Member | Upload leads, run campaigns and answer replies. |
| Viewer | See everything but change nothing. Good for clients and managers. |
Invite someone
- Click Invite someone.
- Enter Their email address.
- Under What can they do?, pick a role. Member is selected by default.
- Under Which workspaces?, choose All workspaces (including ones you add later) or Only some workspaces.
- Click Send invite. You will see “Invite sent to” their address.
They get an email with a link, open it, and either log in or choose a name and password to Accept and create login. Invites expire after 7 days. Open invites appear under Waiting to join and count as seats; use Cancel invite to withdraw one.
Note: If all seats are used, the upgrade dialog opens instead of the invite form. Remove someone or move to a bigger plan.
Change a role or workspace access
- Role: pick a new one from the dropdown in the person’s row.
- Workspaces: click Access in the person’s row, choose the workspaces, and click Save access.
- Remove: click Remove and confirm with Remove from team. They lose access to every workspace right away; their campaigns and emails stay.
Hand over ownership
Only the owner can do this. In the new owner’s row, choose Make owner… from the role dropdown and confirm. You become an admin.
Team details and two-step login
The Team details card holds:
- Team name.
- Billing email: where receipts and payment problems go.
- Two-step login: tick Require two-step login for everyone to make every member turn on two-step login. Anyone without it is blocked from the team’s pages until they turn it on.
Click Save changes.
Tip: Give clients the Viewer role, limited to their own workspace. They can watch campaigns and replies without being able to change anything.
Common mistakes
- Making everyone an admin. Admins can change billing and remove people. Most people only need Member.
- Forgetting open invites use seats. Cancel invites nobody accepted.
- Inviting a personal address. Invite the work email the person logs in with every day.
Next step
Separate brands or clients into their own spaces: Workspaces.
Still stuck? Open a ticket from Swift Support in the app, or contact us.