Create a campaign step by step
Every step and field of the five-step campaign wizard, from choosing leads to starting or scheduling the campaign.
On this page
Who this is for: first-time users, and anyone who wants to know exactly what each wizard field does.
Before you start you need:
- a lead list that has finished importing (it shows Ready),
- at least one sending account,
- a way for the AI to write: your own AI connection, or Swift Pilot credit.
Open Campaigns and click New campaign (or Create campaign if you have none yet). The wizard has five short steps: Choose leads, Subject, Message, Sending rules and Review. Your work is saved each time you move to another step, so you can leave and come back later with Continue setup in the campaign list.
Tip: You can click any step name at the top of the wizard to jump to it. Moving forward still checks the steps in between.
Step 1: Choose leads
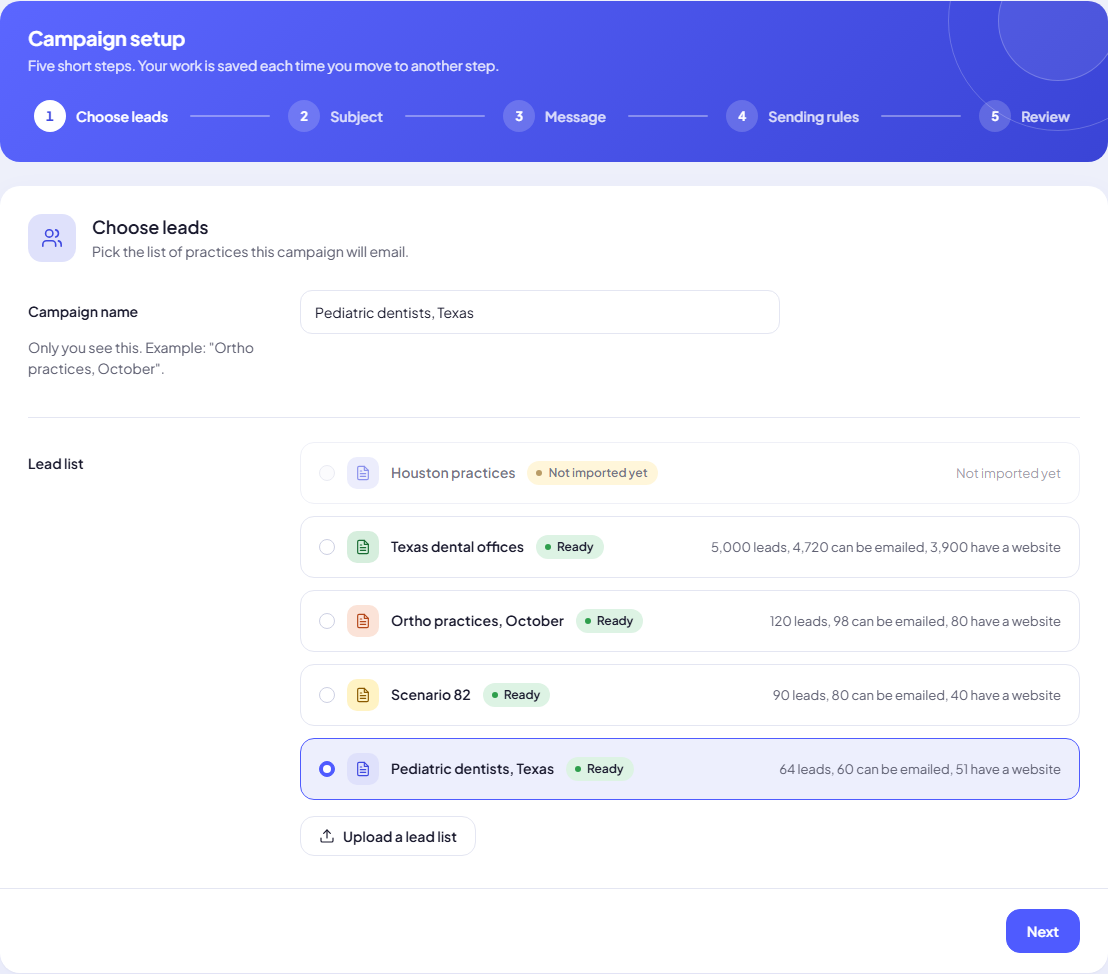
- Campaign name. Only you see this. Example: “Ortho practices, October”.
- Lead list. Pick one list. Each card shows how many leads it has, how many can be emailed and how many have a website. Lists that are still importing show Not imported yet and cannot be picked.
- No list yet? Click Upload a lead list.
- Click Next. The first save creates the campaign as a draft.
Errors you may see: Name is required., Choose an existing lead list., The list has no leads., This list is already used by another active or draft campaign.
Step 2: Subject
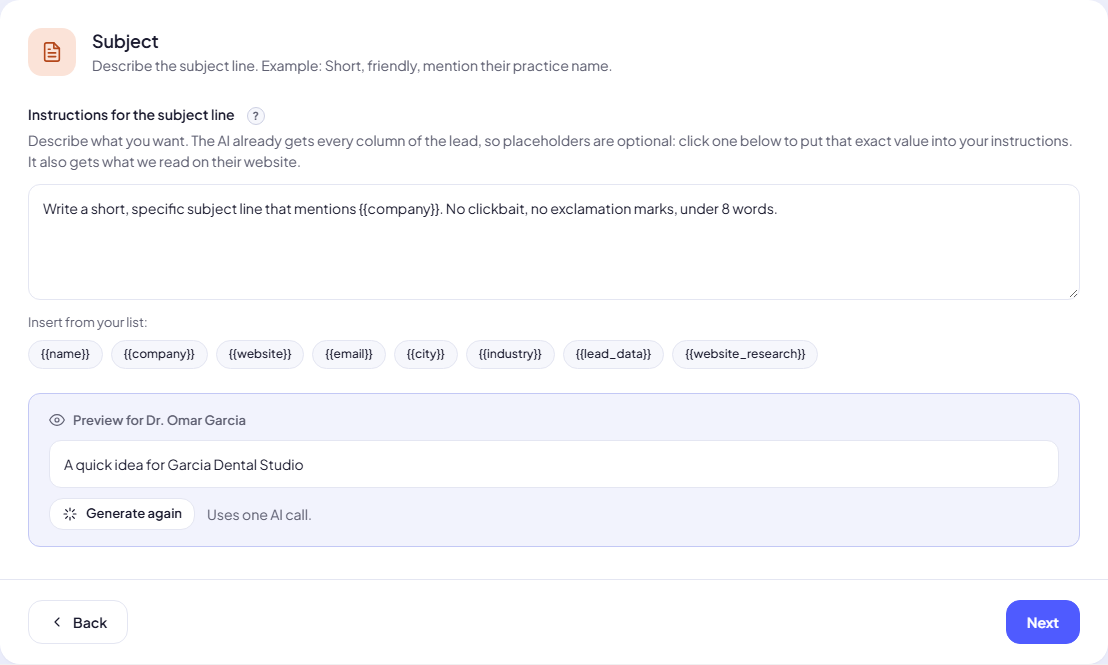
- In Instructions for the subject line, describe the subject you want in plain words. Example: Write a short, specific subject line that mentions their practice. No clickbait, no exclamation marks, under 8 words.
- Optional: click a chip under Insert from your list to put a placeholder such as
{{company}}at the cursor. The AI already sees every column of the lead, so placeholders are only for pinning one exact value. - If you write with your own AI connection, click Generate preview to see a real subject line for the first lead in the list. See Preview the email.
- Click Next.
Step 3: Message
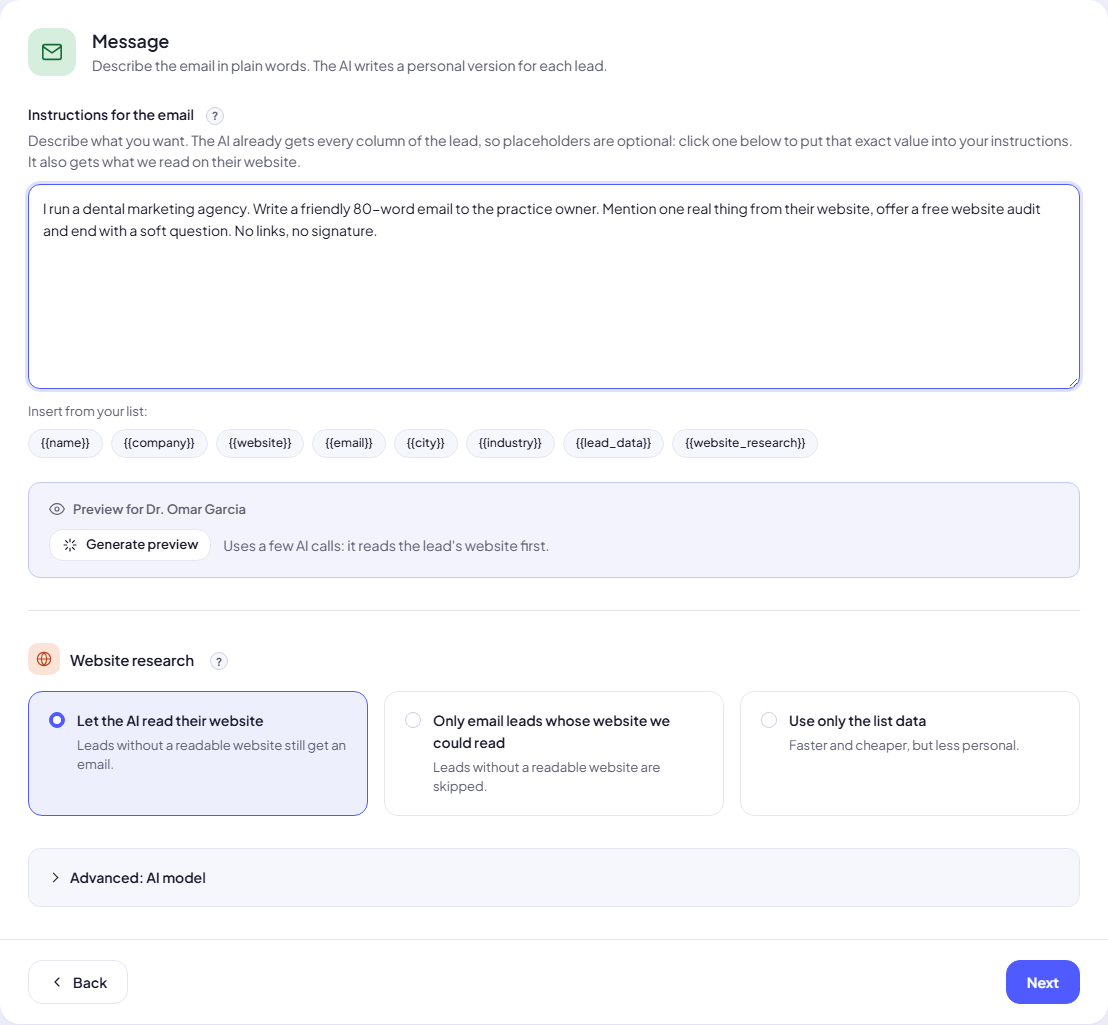
- In Instructions for the email, say who you are, what you offer and what you want them to do. Example: I run a dental marketing agency. Compliment their website, offer a free audit, ask for a 10-minute call. Tips for this box are in Write subject and email instructions.
- Use the chips to insert placeholders if you need an exact value.
- Choose Website research:
- Let the AI read their website: leads without a readable website still get an email.
- Only email leads whose website we could read: leads without a readable website are skipped.
- Use only the list data: faster and cheaper, but less personal.
- Optional, Advanced: AI model (only when you have your own AI connection):
- Automatic: all enabled connections, best available first. If one is busy, the next one writes.
- Use one connection: pick the AI connection and, if you like, an AI model. Leave the model on Connection default to use that connection’s default.
- Click Next.
Note: Without an AI connection of your own, the note at the top of this step says Swift Pilot writes your emails and shows the credit left. Swift Pilot has no model choice; every other setting works as it does with your own key.
Step 4: Sending rules
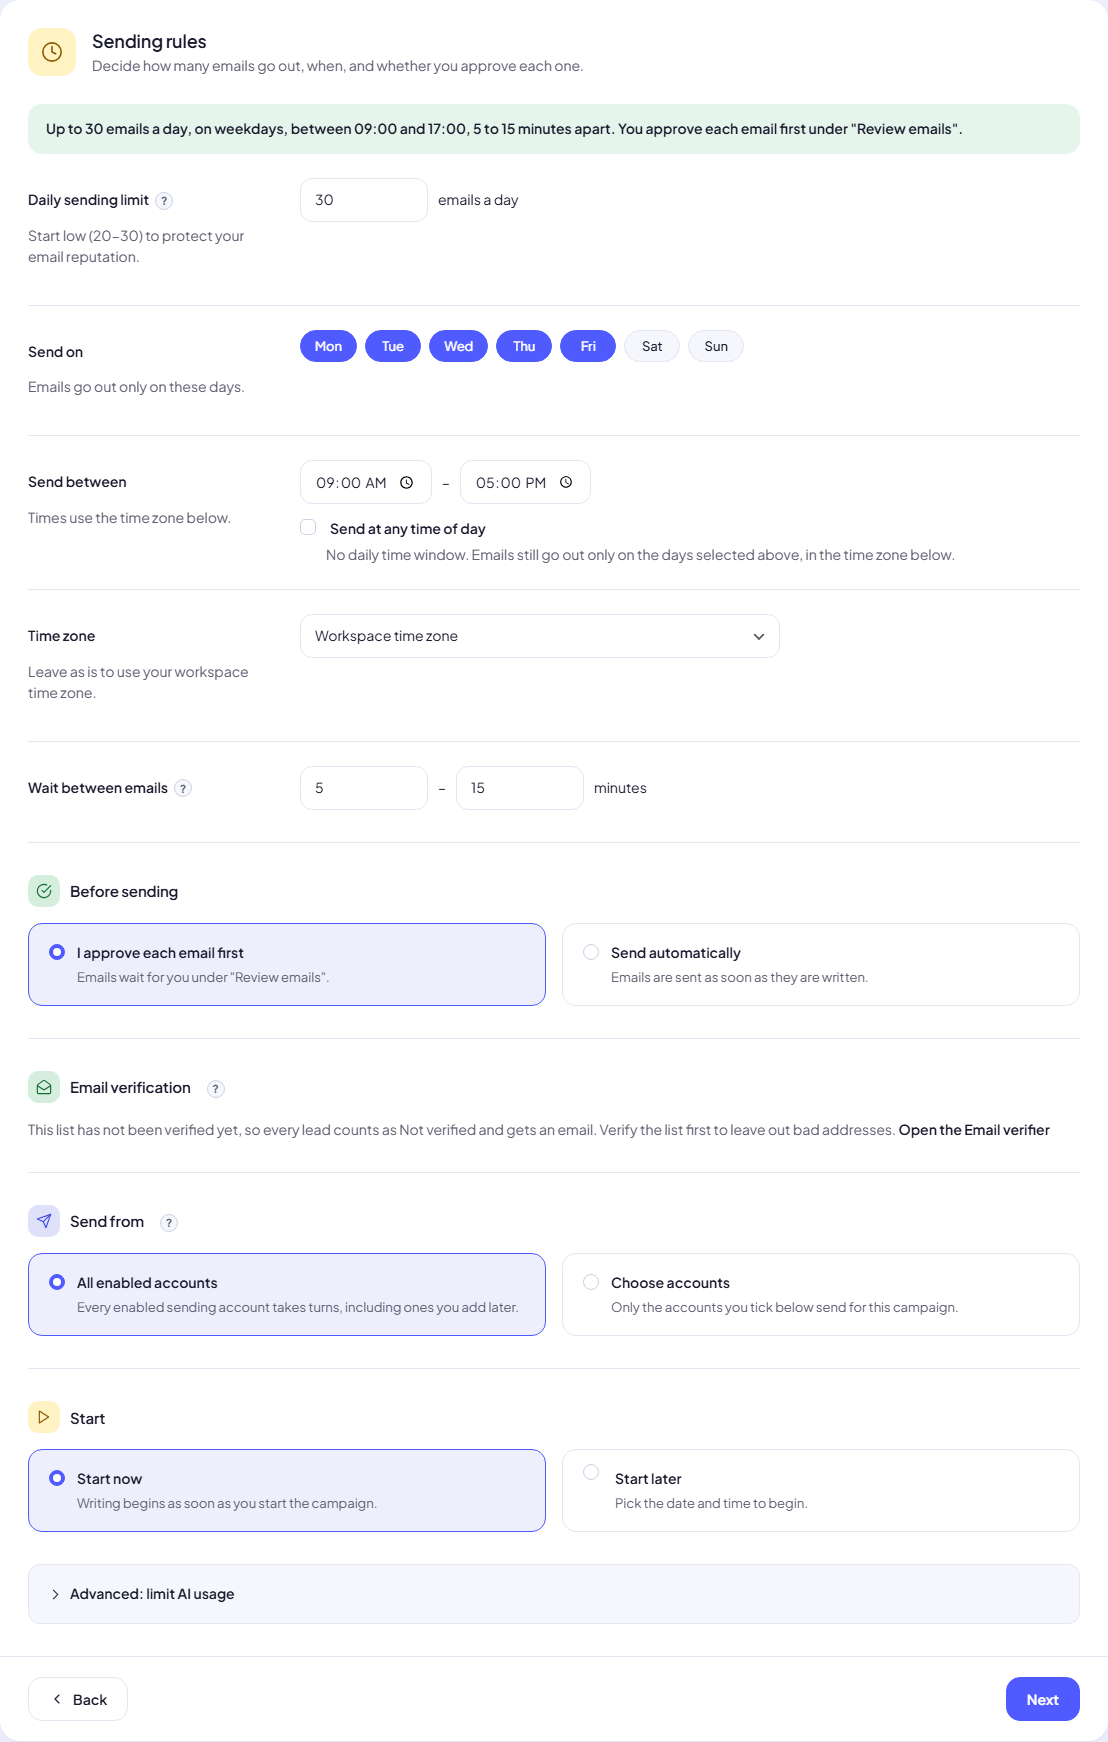
The green line at the top sums up your choices in one sentence and updates as you type.
| Field | What it does | Default |
|---|---|---|
| Daily sending limit | Most emails this campaign sends in one day (1 to 1,000). Start low (20-30) to protect your email reputation. | 30 |
| Send on | The weekdays emails may go out. Pick at least one. | Every day |
| Send between | The daily time window. The end must be after the start (no overnight window). | 09:00 - 17:00 |
| Send at any time of day | Removes the time window. Emails still go out only on the chosen days. | Off |
| Time zone | The zone for the window and the days. Leave on Workspace time zone to use your workspace’s. | Workspace time zone |
| Wait between emails | A random wait, in minutes, between two emails (0 to 1,440). 5-15 means one email roughly every 10 minutes. | 5 - 15 |
| Before sending | I approve each email first (emails wait under “Review emails”) or Send automatically (sent as soon as they are written). | I approve each email first |
| Email verification | Which verification results may be emailed: Valid, Risky, Unknown, Not verified, Invalid. | All except Invalid |
| Send from | All enabled accounts (every enabled account takes turns, including ones you add later) or Choose accounts (tick the ones to use). | All enabled accounts |
| Start | Start now or Start later with a date and time. Shown on drafts only. | Start now |
Email verification changes with your situation:
- If your plan does not include the Email verifier, the step says every lead with an address is emailed.
- If the list was never verified, every lead counts as Not verified and gets an email. Verify the list first to leave out bad addresses.
- Otherwise each result shows how many leads have it. Ticking Invalid shows a warning: Invalid addresses bounce. Bounces hurt your sender reputation, so more of your other emails end up in spam.
Leads whose result you leave out are not emailed and stay in the list.
Advanced: limit AI usage has three caps for cost control:
| Field | Range | Default |
|---|---|---|
| AI requests per lead | 1 - 20 | 5 |
| Website pages read per lead | 0 - 10 (fixed at 1 with Swift Pilot) | 2 |
| Website text read per lead | 1,024 - 32,768 (8,000 is about two pages) | 8,192 |
Click Next. Every field is checked before you move on, for example The end time must be after the start time (no overnight window). or Select at least one sending account.
Step 5: Review
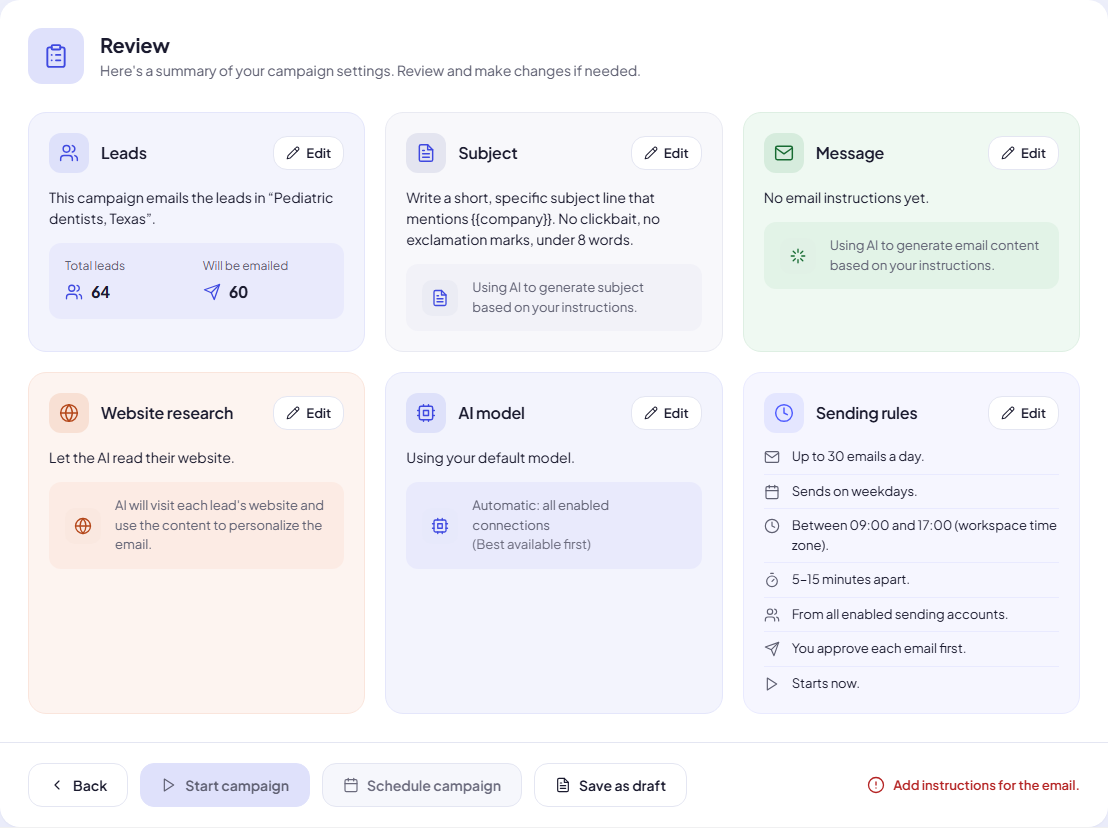
Six cards sum up the campaign: Leads, Subject, Message, Website research, AI model and Sending rules. Each has an Edit button that takes you back to its step.
The line in the bottom right tells you if you are ready:
- All set to launch! means you can start.
- A red sentence names the first thing missing, for example Add instructions for the email. or Subject instructions are required. The start buttons stay disabled until it is fixed.
Then choose one:
- Start campaign: starts now. You land on the campaign page with Campaign started. You can leave this page; it keeps running.
- Schedule campaign: shows a Start on date and time; pick one and click Schedule. The campaign stays a draft marked Scheduled and starts by itself. The time must be in the future.
- Save as draft: keeps everything and takes you back to the list.
Warning: If your plan’s limit of active campaigns is reached, starting opens the upgrade dialog instead. Pause or stop another campaign, or move to a bigger plan.
Editing after the start
Once a campaign has started, the wizard opens as Campaign setup with the note that leads and instructions are locked. While the campaign is Paused you can still change the sending rules: daily limit, sending days and window, waits, review or automatic mode, email verification results and the AI usage caps. Click Save on the Review step. Emails already scheduled are re-timed to the new rules.
To change the instructions of a paused campaign, use the Instructions for the AI card on the campaign page instead.
Common mistakes
- Daily limit higher than your accounts allow. Each sending account also has its own daily cap. The campaign sends the lower of the two.
- A window that is too short. A 1-hour window with 10-minute waits sends about 6 emails a day, whatever your daily limit says.
- Choosing accounts, then disabling them. If none of the chosen accounts is usable, nothing is sent.
Next step
Make the AI write emails that get replies: Write subject and email instructions.
Still stuck? Open a ticket from Swift Support in the app, or contact us.