Choose which addresses a campaign emails
Use the campaign's Email verification setting to send only to the verification results you trust.
On this page
Who this is for: anyone creating a campaign from a list that has been verified.
Each campaign decides which verification results it emails. Leads with a result you leave out are not emailed and stay in the list.
Steps
- Create or edit a campaign. See Create a campaign.
- In step 4, Sending rules, find Email verification.
- Tick the results this campaign may email. Each line shows how many leads of the chosen list have that result.
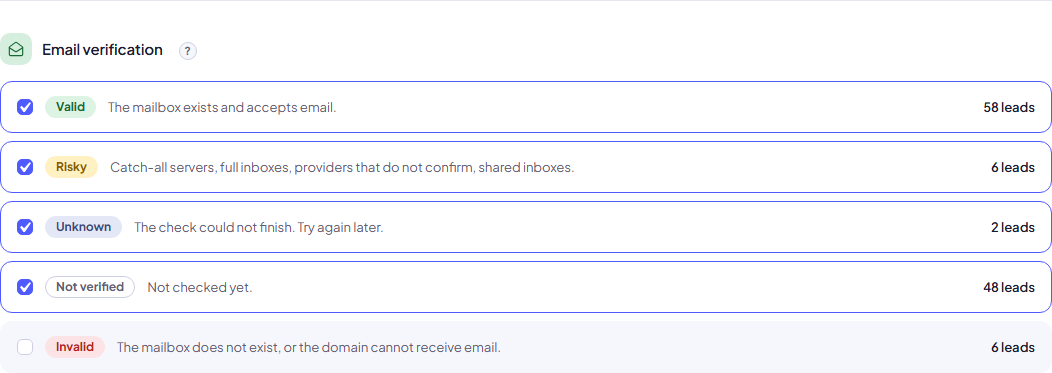
| Result | Ticked by default? |
|---|---|
| Valid | Yes |
| Risky | Yes |
| Unknown | Yes |
| Not verified | Yes |
| Invalid | No |
At least one result must be ticked. The Review step and the campaign page repeat your choice, for example Only leads whose address is Valid or Risky.
Warning: If you tick Invalid, a warning appears: Invalid addresses bounce. Bounces hurt your sender reputation, so more of your other emails end up in spam. Only tick it if you know better than the verifier.
Special cases
- The list was never verified: every lead counts as Not verified and gets an email. The setting explains this and links to the Email verifier. Verify first to leave out bad addresses.
- Your plan has no verification (Free): the campaign emails every lead that has an address.
Recommended settings
| Goal | Tick |
|---|---|
| Safest: a new domain or a new mailbox | Valid only |
| Careful: a verified list, nothing uncertain | Valid and Risky |
| The default: everything except Invalid | Valid, Risky, Unknown, Not verified |
Next step
Keep your bounce rate low over time: Keep your bounce rate low.
Still stuck? Open a ticket from Swift Support in the app, or contact us.