Connect a sending account
Add the Gmail, Outlook, Zoho or other email account your campaigns are sent from, with an app password, sensible limits and a test email.
On this page
Who this is for: everyone. A campaign cannot send until at least one sending account is connected and turned on.
A campaign can only use an account after a test email from it has been sent successfully. Changing the server, login or sender email means sending a new test.
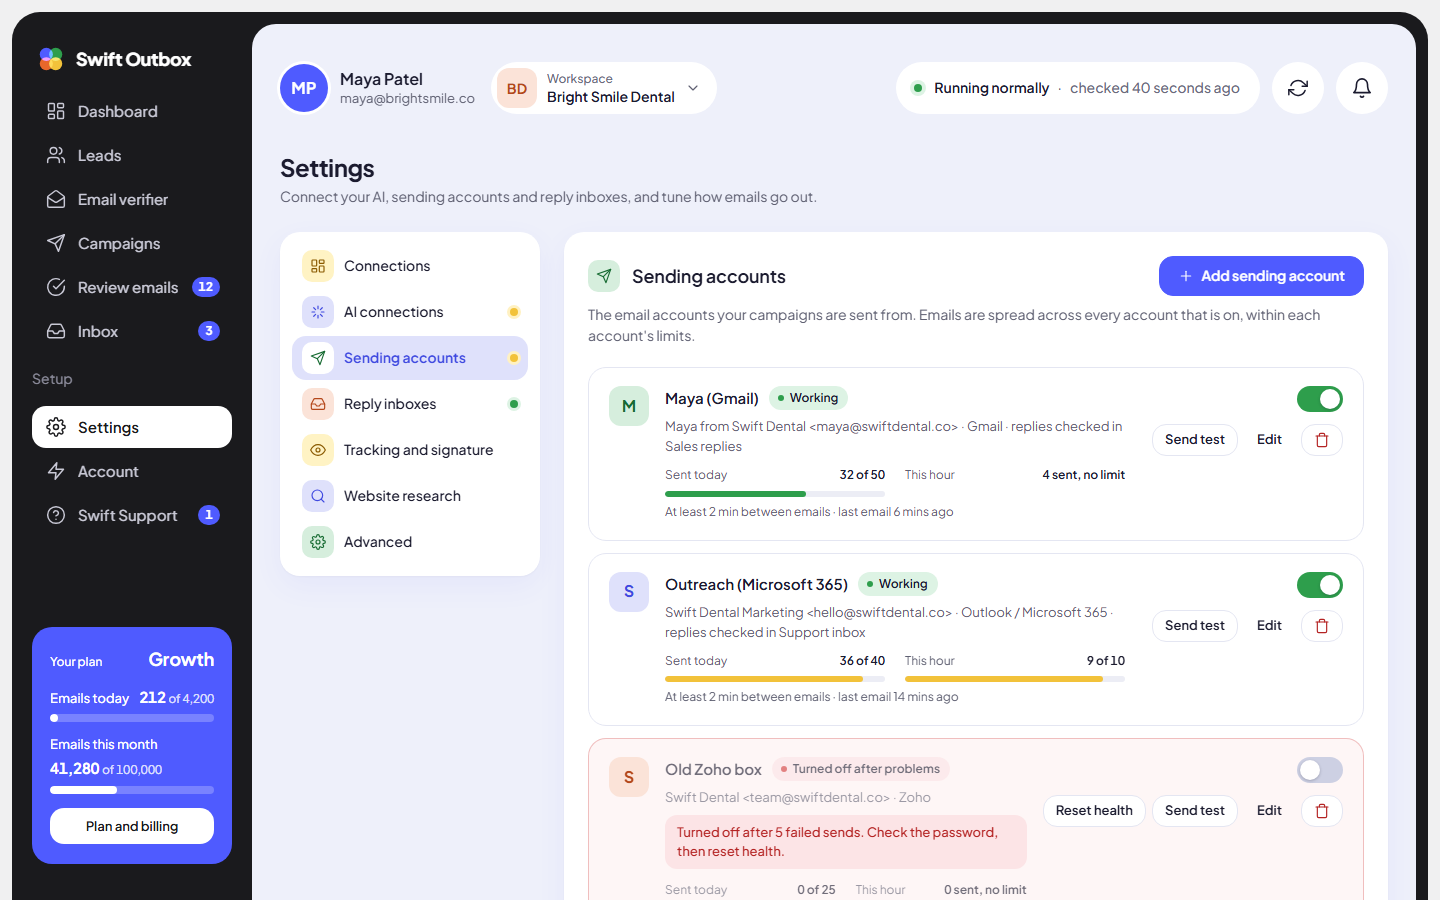
A sending account is an email account the app sends your campaigns from, over SMTP. Emails are spread across every account that is turned on, each within its own limits. You manage them in Settings > Sending accounts.
Before you start: get an app password
Most email providers do not let apps log in with your normal password. You create an app password instead: a separate password just for this app, which you can revoke at any time.
- Gmail / Google Workspace: turn on 2-Step Verification in your Google account, then open Google app passwords, create one and copy the 16 letters.
- Outlook / Microsoft 365: use your Microsoft password, or an app password if 2-step verification is on for the account.
- Zoho: create an app password in your Zoho account’s security settings.
- Any other host: ask your email host for the SMTP server, port and password to use.
Warning: Never paste your password into a support ticket, a chat or a document. If someone asks for it, they are not us.
Add the account
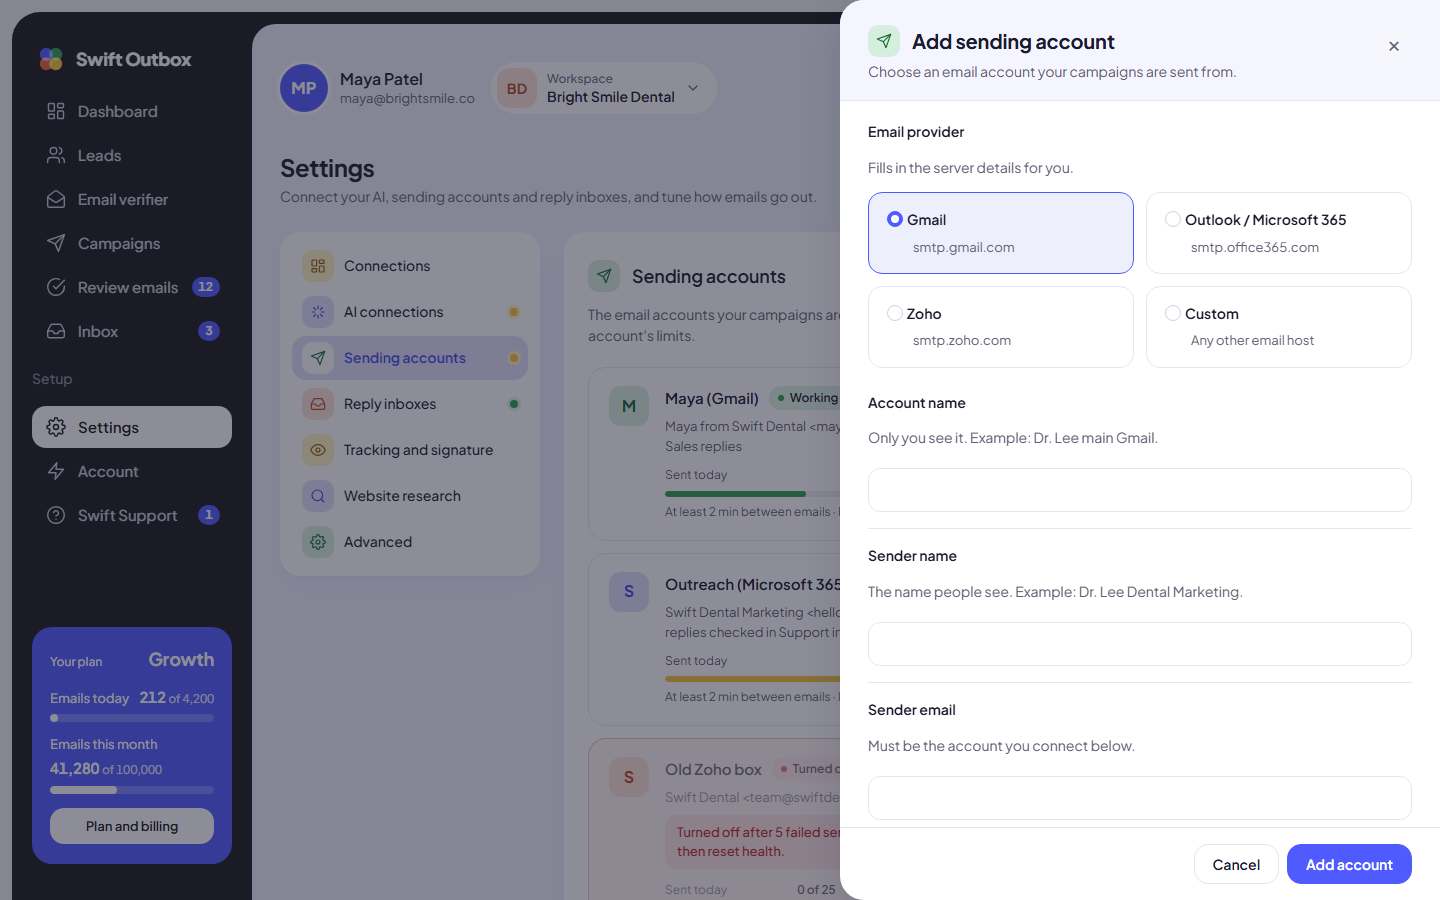
- Go to Settings > Sending accounts and click Add sending account.
- Under Email provider, pick Gmail, Outlook / Microsoft 365, Zoho or Custom. The server details fill in for you.
- Account name: a label only you see, for example “Dr. Lee main Gmail”.
- Sender name: the name people see in their inbox, for example “Dr. Lee Dental Marketing”.
- Sender email: the address you send from. It must be the account you are connecting.
- Replies go to (optional): a different address for replies. Leave it empty to use the sender email.
- Email address or username: usually your full email address.
- Password or app password: paste the app password from above.
- Set the Limits (see below) and pick the Reply inbox where replies to this account are checked, if you have one.
- Click Add account.
The server details
If you picked a provider, you can leave Server details (filled in for you) closed. For Custom, open it and enter:
| Provider | Server | Port | Security |
|---|---|---|---|
| Gmail | smtp.gmail.com | 587 | TLS |
| Outlook / Microsoft 365 | smtp.office365.com | 587 | TLS |
| Zoho | smtp.zoho.com | 465 | SSL |
| Custom | From your host | Usually 587 or 465 | TLS with 587, SSL with 465 |
Changing any server field switches the provider to Custom.
Set safe limits
| Field | Default | What it does |
|---|---|---|
| Daily sending limit | 50 | The most emails this account sends in a day. Most new accounts start at 30 to 50. |
| Hourly limit | 0 | The most per hour. 0 means no hourly limit. It cannot be higher than the daily limit. |
| Wait between emails (seconds) | 60 | The shortest gap between two emails from this account. Longer gaps look more human. |
More on pacing in Daily limits and sending windows.
Send a test email
Saving does not test the account, so test it yourself:
- On the account row, click Send test.
- Enter an address you can check under Send the test to, and click Send test email.
- You should see “Test email sent to” your address. Check that inbox, and the spam folder.
If you see “The test email could not be sent”, check the server details and the app password, then try again.
Read the account’s health
Each account shows a badge:
- Working: sending normally.
- Needs attention: something failed recently. Read the note on the row.
- Not working: the last attempt failed. Usually the password changed or the app password was revoked.
- Turned off after problems: the app turned the account off after 5 failed sends in a row, to protect your other accounts.
- Turned off: you switched it off with the toggle.
- Not checked yet: no email has been sent from it yet.
To fix an account: click Edit, enter a new app password, save, then click Reset health. You will see “Health reset. The account is tried again on the next send.”
Tip: Add two or more sending accounts. Emails are spread across all of them, so each one sends fewer emails a day and your reputation stays healthy.
Common mistakes
- Normal password instead of an app password. Gmail and Zoho reject it. Create an app password.
- Sender email that does not match the login. Many providers reject or flag emails sent “from” an address that is not the logged-in account.
- A daily limit of hundreds on a new account. New mailboxes that send a lot right away get flagged as spam.
- Never testing. Always click Send test after adding or editing an account.
Next step
Make sure replies show up in the app: Reply inboxes.
Still stuck? Open a ticket from Swift Support in the app, or contact us.