Sign up and choose a plan
Create your account in three steps, confirm your email with a 6-digit code, and pick the Free plan or a paid plan.
On this page
Who this is for: anyone creating a Swift Outbox account. It takes about ten minutes, most of it reading your email for the code.
Sign-up happens on one page called Create your account. It has three steps that open one at a time: Your details, Confirm your email and Choose your plan. Each step unlocks when the one before it is done, and finished steps show a green check.
Step 1: Your details
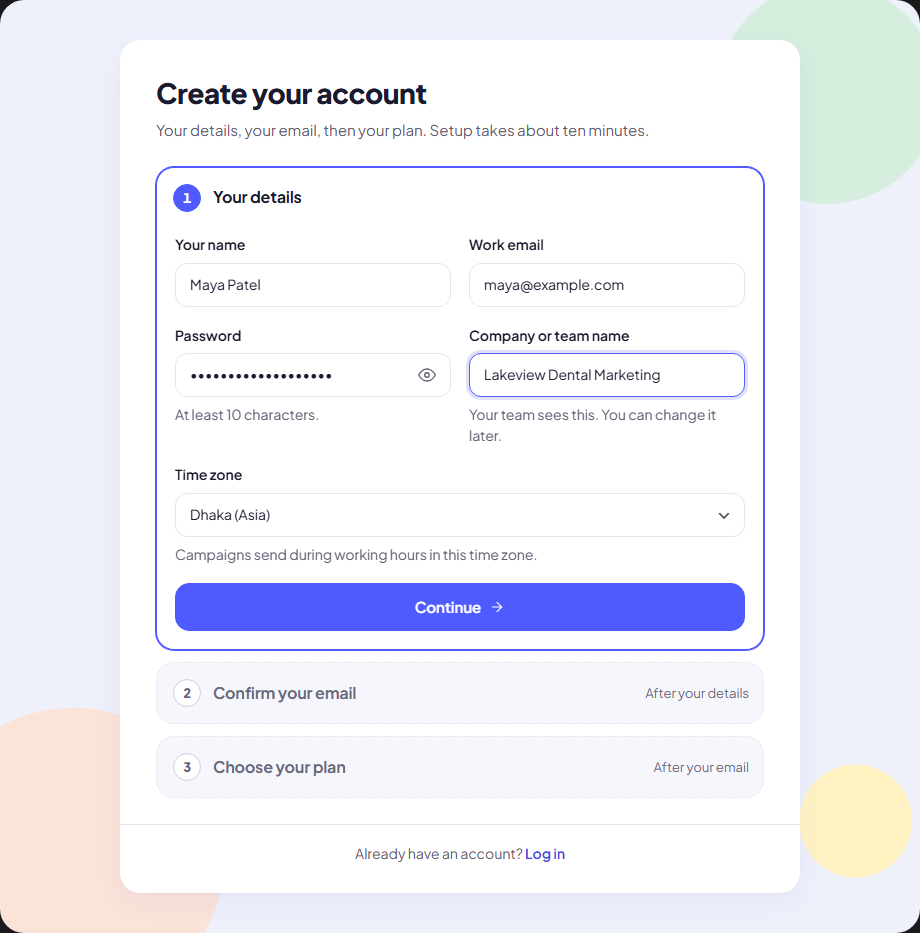
- Open the sign-up page from Start free on this website, or from a plan on the pricing page. A plan you pick on the pricing page is already selected in step 3.
- Fill in Your name, Work email and Password. The password needs at least 10 characters.
- Enter your Company or team name. Your team sees this name, and you can change it later.
- Check the Time zone. It defaults to your computer’s time zone. Campaigns send during working hours in this time zone, so set it to where your leads are if that is different.
- Click Continue. Your account is created and you are signed in.
Note: If the email is already in use, the error appears under Work email. Log in instead, or use Forgot your password? on the login page.
Step 2: Confirm your email
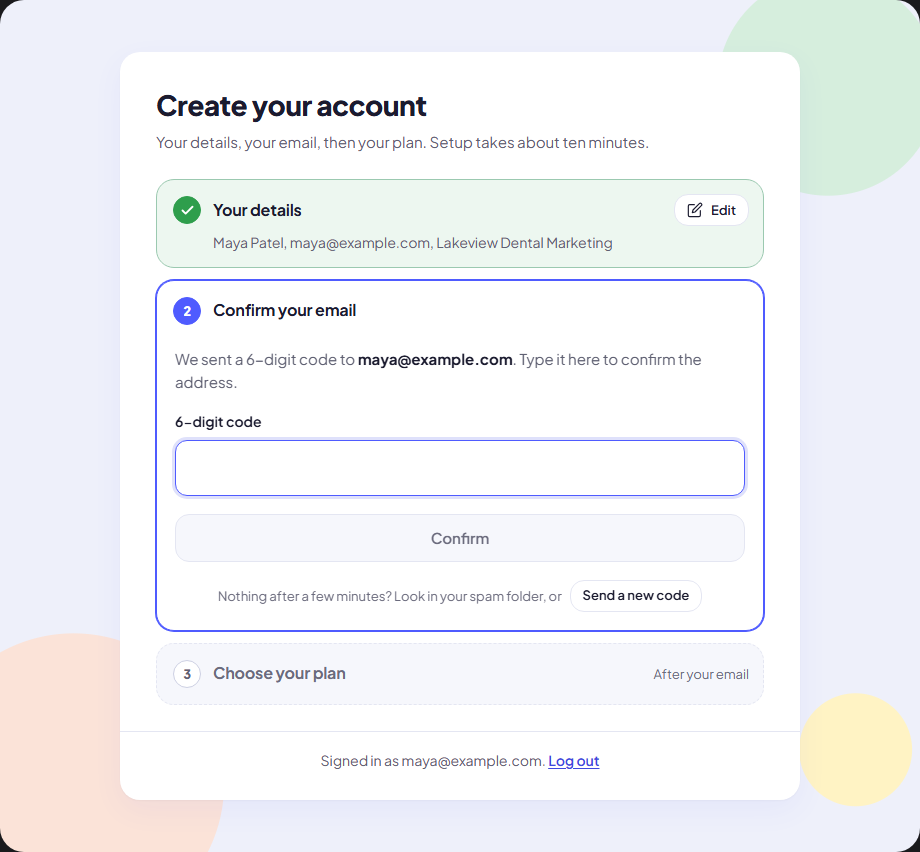
- Open the email we sent to the address you entered. It contains a 6-digit code.
- Type or paste the code into the 6-digit code field. Pasting
123 456or123-456works too; spaces and dashes are removed. - Click Confirm.
No email after a few minutes? Look in your spam folder, then click Send a new code. You can ask for a new code every 30 seconds.
Step 3: Choose your plan
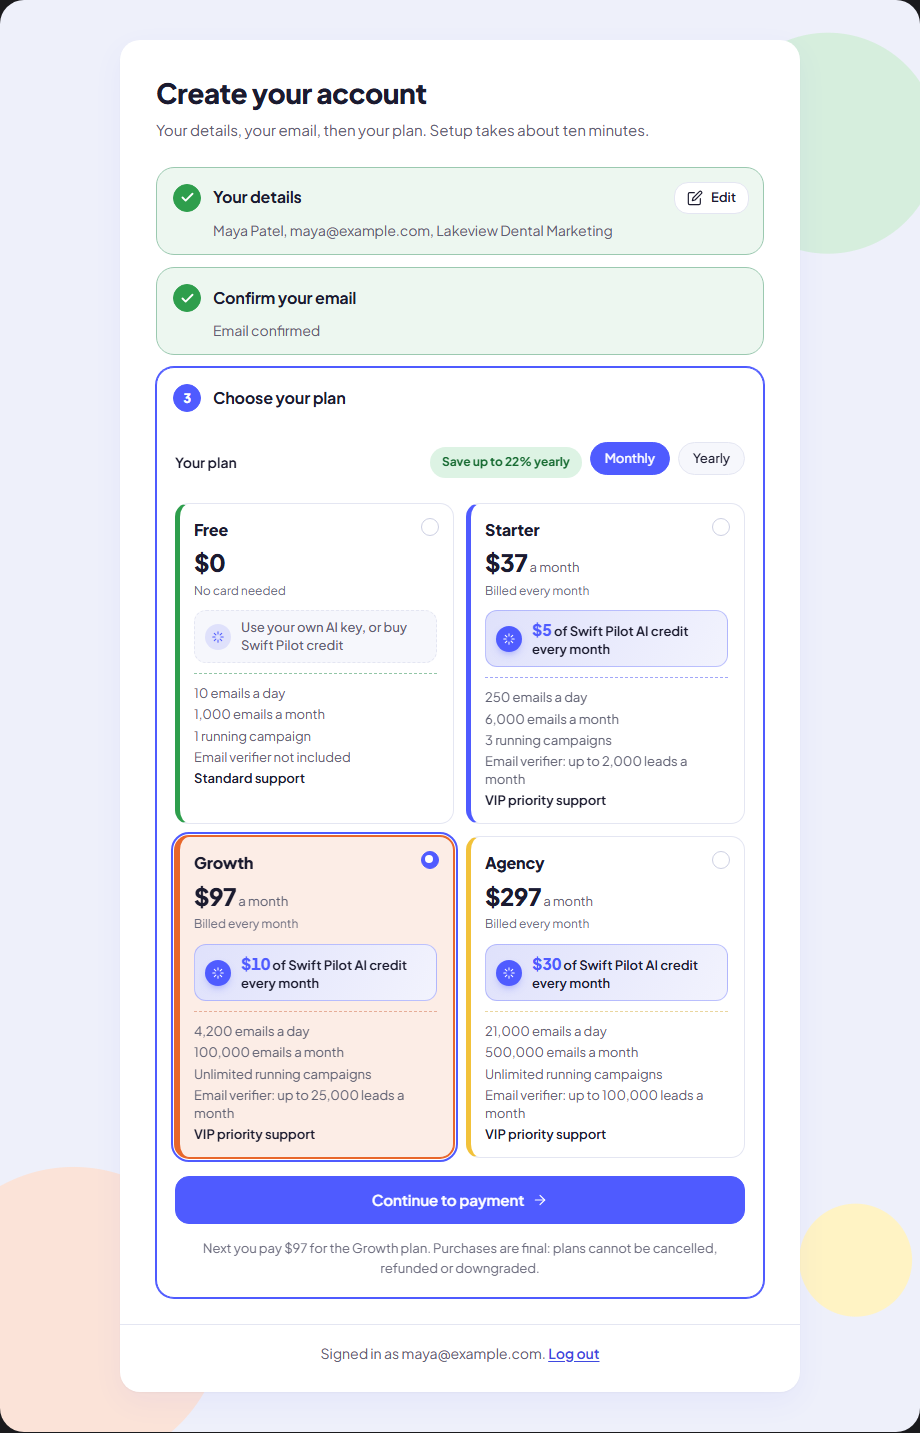
- Choose Monthly or Yearly at the top. Yearly costs less per month; the card shows how much you save.
- Pick a plan card. Each card lists its emails a day, emails a month, running campaigns, Email verifier allowance, Swift Pilot credit and support level.
- Click the button under the cards:
- Create free account on the Free plan. No card is needed. You go straight to your Dashboard.
- Continue to payment on a paid plan. The payment step opens next.
Free or paid?
| Free | Paid plans (Starter, Growth, Agency) | |
|---|---|---|
| Price | $0, no card | Monthly or yearly |
| Emails | 80 a day, 2,000 a month | From 250 a day and 6,000 a month |
| Email verifier | Not included | Included, with a monthly allowance |
| Swift Pilot credit | None included (use your own AI key, or buy credit) | Monthly credit included |
| Support | Standard priority | VIP priority |
The Free plan is how you try the app. See Plans, credits and upgrades for every limit.
Pay for a paid plan
- On Pay for your plan, check the plan and price shown, for example “$97 a month”.
- Click Pay now. A secure checkout window opens. Coming straight from step 3, it opens by itself.
- Enter your payment details and finish the checkout. The button shows Checking your payment… while we confirm it.
- When the payment goes through, your Dashboard opens.
If the payment does not go through, you see “Payment did not go through. Please try again.” Click Try payment again, or Change plan to pick another one.
Warning: Purchases are final: plans cannot be cancelled, refunded or downgraded. You can always move to a higher plan later. Start on Free if you are not sure.
Common mistakes
- Using a personal email you rarely check. Your sign-up code, receipts and support replies go to this address.
- Leaving the wrong time zone. Campaign sending windows use it. You can change it later per workspace, but it is easiest to get right now.
- Closing the tab before paying. That is fine. Log in again and the sign-up page opens at the step you still need to finish.
Next step
Your account is ready. Follow the Quick start: your first campaign in 10 minutes.
Still stuck? Open a ticket from Swift Support in the app, or contact us.